Linda caught up with some school students using the power of the worm to decrease their waste, increase their vegetable harvest and raise money
for their school. Here she shares some tips on worm farming.
Jasmine, Shakira and Nemesia from Nicholson Street Public School, East Balmain wrote in to say, “We plant our own vegetables and give them all
the T.L.C they need, including weeding and watering and fertilising with our own worm wee that we get from our worm farm. We then sell
the vegetables and herbs [for a very cheap price] at the school gate to raise more money for things at the school. We also sell the worm
wee to parents and friends to take home for use in their own gardens. We water all of our gardens from our rainwater tank. As well as our worm
farm we also compost and use this on our garden.”
I thought I’d visit to see how things were progressing at Nicholson Street Public and found a delightful group of kids who were learning about the environment
through their garden. Jasmine explained it best when she said the reason why she likes gardening is because “she loves getting dirty!”
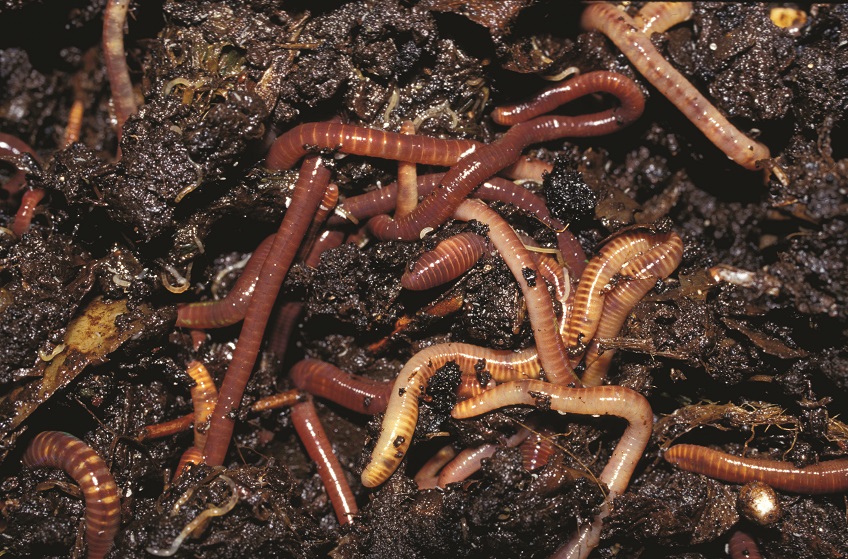
Photo - Kevin Howchin
It’s worth taking note of the kids’ use of worms to feed their garden, and to reduce their food compost. Worms, vermicast and worm wee are essential elements
for a biodynamic soil, a healthy soil full of trace elements and nutrients to encourage strong vigorous growth, especially in the vegetable patch.
While everyday garden earthworms are an excellent sign that your soil is healthy, and very welcome as they do so much work for you in the garden, the
worms that live in worm farms are compost worms: tiger worms and red worms from the Amazon. You can buy them in bags from garden centres and some hardware
stores, usually in bags of 500.
Setting up a Worm Farm
Place the worm farm in a cool shaded area, though morning sun is fine. Open the worm farm and use the wrapping cardboard as a bottom bedding layer. Soak
the coconut fibre block in water, then spread this out as the worms’ bedding. Add 1000 worms and top with a layer of something moist to stop them drying
out. You could use about six sheets of newspaper torn into strips, or a piece of hessian or carpet.
Think of a worm farm like a worm penthouse – the bottom layer is the toilet where you collect the wonderful worm liquid, the middle layer their lounge room
and the top level is the kitchen where you leave the food.
After 7 to 10 days you can start adding your kitchen scraps under the Hessian top layer. Add more when scraps are eaten. It might take a while to
really get the worms humming – but when they are you’ll be able to hear them mulching! Chop up kitchen scraps finely for the worms and feed a little
and often. Every time you feed them add a handful of soil – this helps the worms’ digestive system. If the food decays faster than the worms can process
it, it could become smelly, if this happens reduce the amount of scraps.
Flush out the system every week with 5 litres of water and dilute this to the colour of weak tea and use it around the garden. Every month add a handful
of garden lime.
Harvest the worm castings by attracting the worms into the top layer with melon (they love rockmelon), then pick them up and put them in a bucket.
Don’t leave them in the sun. Scrape out castings and siphon off the worm liquid. Use worm liquid diluted 1 to 10 and water the entire garden with it
– leaves and all! Provide new bedding for your worms, like wet hay or newspaper and off you go again. Soon you’ll have free fertiliser and compost
for your garden and a happy community of worms.
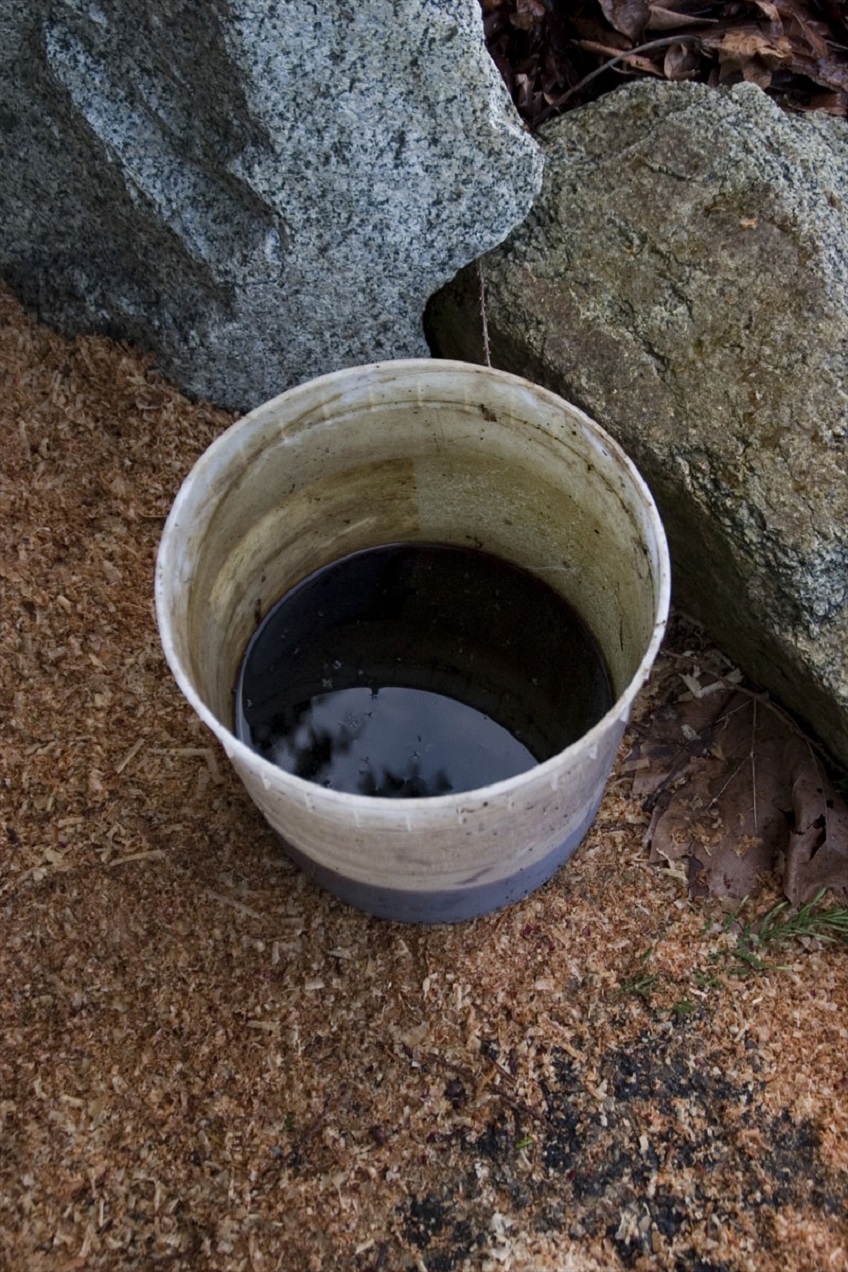
Worm liquid. Photo - source unknown
Worm tips (from Nicholson Street Public School)
1. Use an old bucket (a large Sudden Impact for Roses bucket is perfect!) for kitchen scraps and chop them up into finer pieces with a small spade
before adding it to the worm farm.
2. Worms don’t like onions, garlic, meat and citrus.
3.You can use worms in your normal garden compost to accelerate the composting process.
Text: Linda Ross